
7 Easy Tips for Photographing Paris (Or Anywhere!)
This website uses affiliate links which may earn a commission at no additional cost to you. As an Amazon Associate I earn from qualifying purchases.
Updated: 31st May 2017
By far, the most common question I get asked is, ‘What camera do you use?’ and whilst gear is important, it’s the way you look at things that really define an image. Here are some super simple tips to make an image a little bit more ‘gram-worthy, and what better destination to use for an example than Paris, one of the most photographed cities on the planet?
All the images on this post were taken on either a point-and-shoot or mobile; there is no need to use a DSLR to start photographing a little differently.
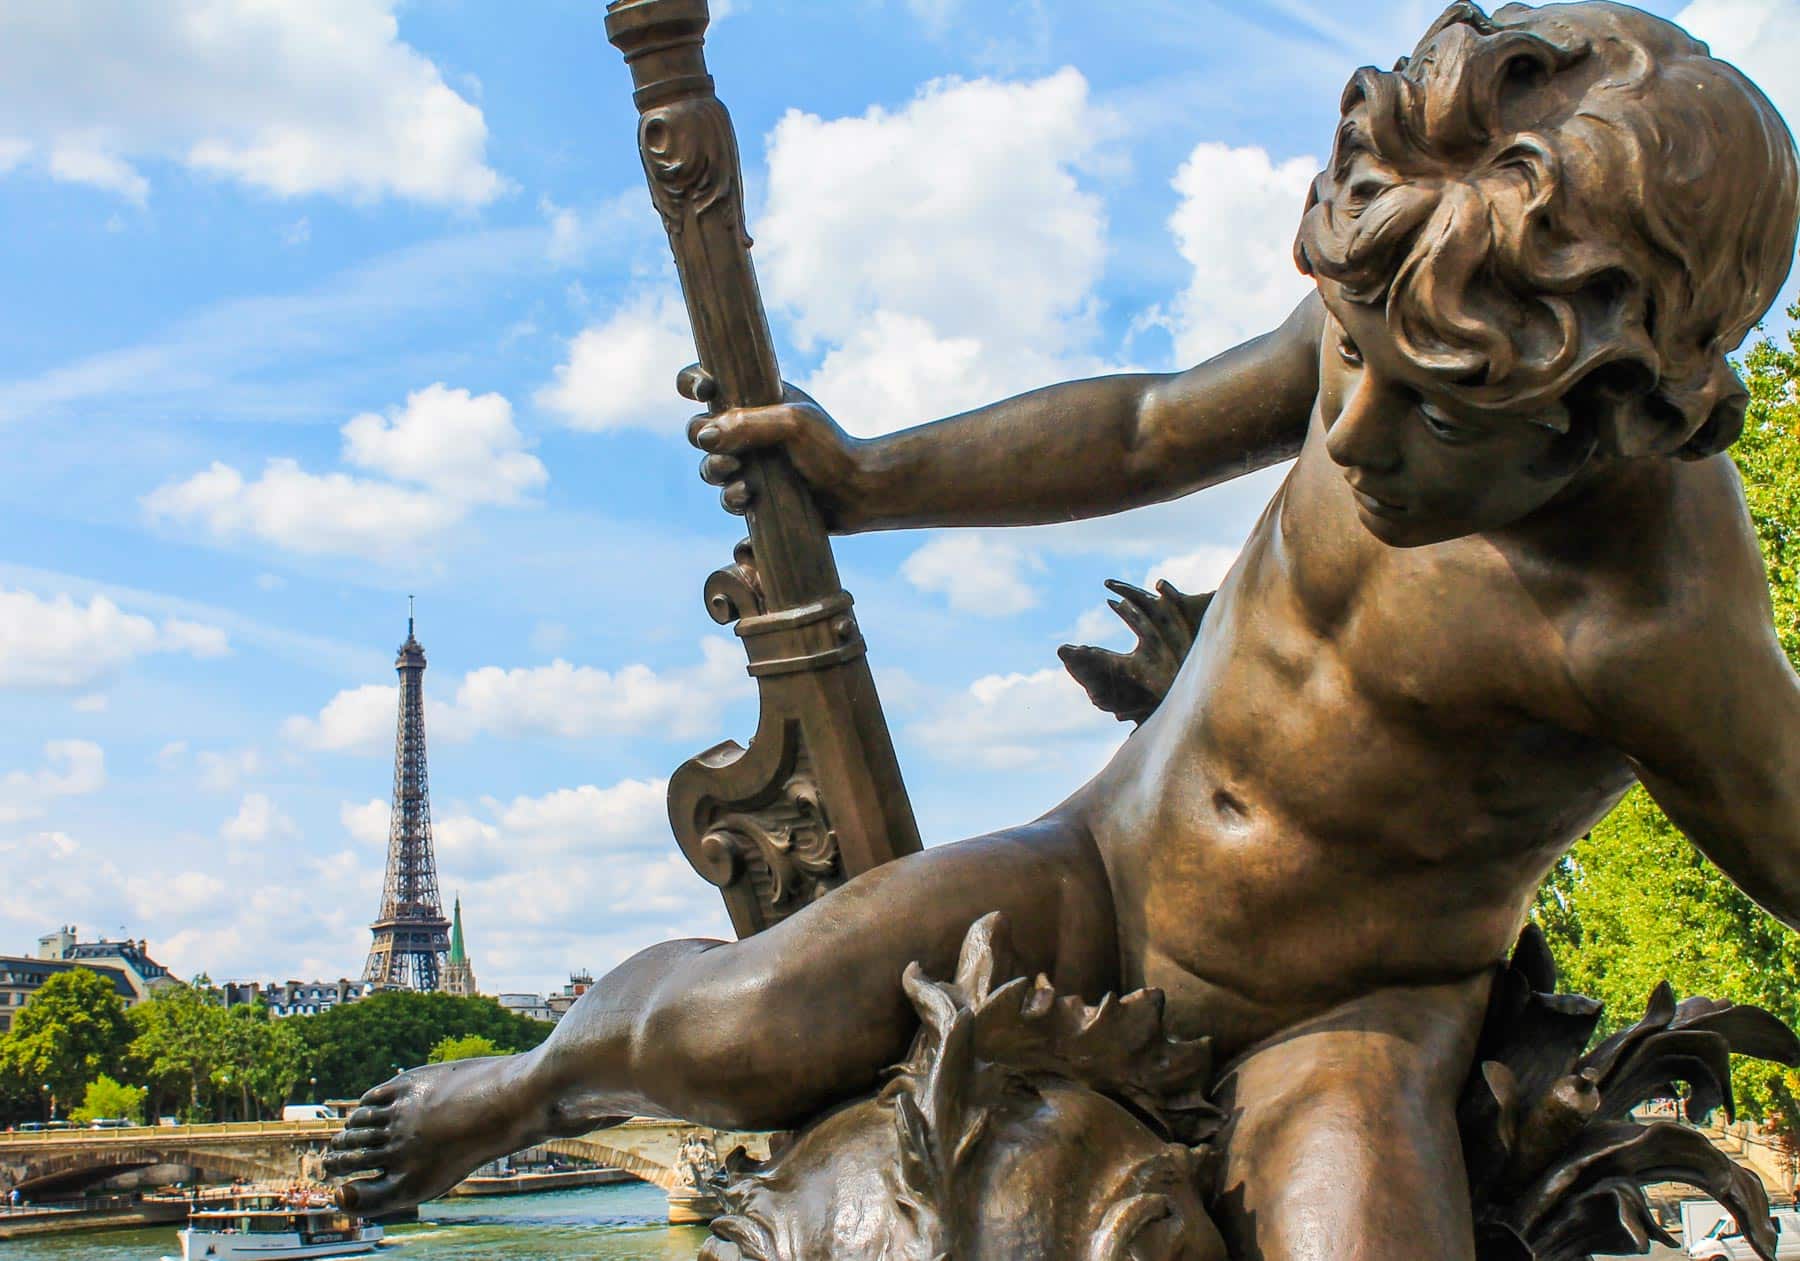
1. Use foreground objects to complete the image
One of the easiest ways to make a photo more engaging and to add extra levels to your images is to add a foreground aspect to the frame. In these photos of the Eiffel Tower, I have used the imposing statues that litter Paris to add more interest, rather than having a blue sky with just the tower in the background.
You still know it is Paris, and the eye line and foot of the statue lead you to the most famous point of the photo. Play around with different objects that are closer to you to add more depth.
Best spot to try this in Paris: The Pont Alexandre III bridge makes for a great vantage point to have the Eiffel Tower in the distance, with plenty of statues and houses to play with in the foreground.
2. Make the most of the reflections
#PuddleGram might have caught on, but making the most of flat waters or recent rainfall is the best way to give your photos a unique perspective. The object may still be the same, but the weather and water will change.
I’m a fully-fledged member of the lying down on the floor and get covered in the crap club, but if that’s not your thing, then these images are as easy as turning your phone upside down so the camera lens is as close to the water as possible and then taking the shot. Try experimenting with different angles, pointing the lens slightly further up or down to create a focus on one part. It doesn’t need to be a perfectly balanced reflection, as cropping can draw the eye more towards where you think is most interesting.
Paris Accommodation Tip: If you want a super handy base and a hotel that is truly Instagram-worthy, then the Citizen M hotel at Gare de Lyon station is a great call. Not only are you perfectly located to start and finish your trip, but the popular tourist bus routes and train connections make it too easy. If you want that perfect croissant overlay shot or a bookshelf framed, check in ‘gram. This is the hotel for you.
3. Frame the main focus with some action
Movement can really make a photo come alive, especially in an Urban environment. If you have a DSLR and a tripod, then long exposures can be a great way to nail those types of images.
If you are reliant on the phone in your pocket, then finding action in your surroundings is just as good. Whether it is fountains, fairgrounds, birds, trains, or anything else that moves, adding extra texture and animation to the shot can be an ideal frame for an otherwise seen-before photo.
Best spot to try this in Paris: The Trocadéro Gardens are a great spot to frame the Eiffel tower amidst the fountains or crowds of people, the main square usually has plenty of pigeons which can add to the shot as well.
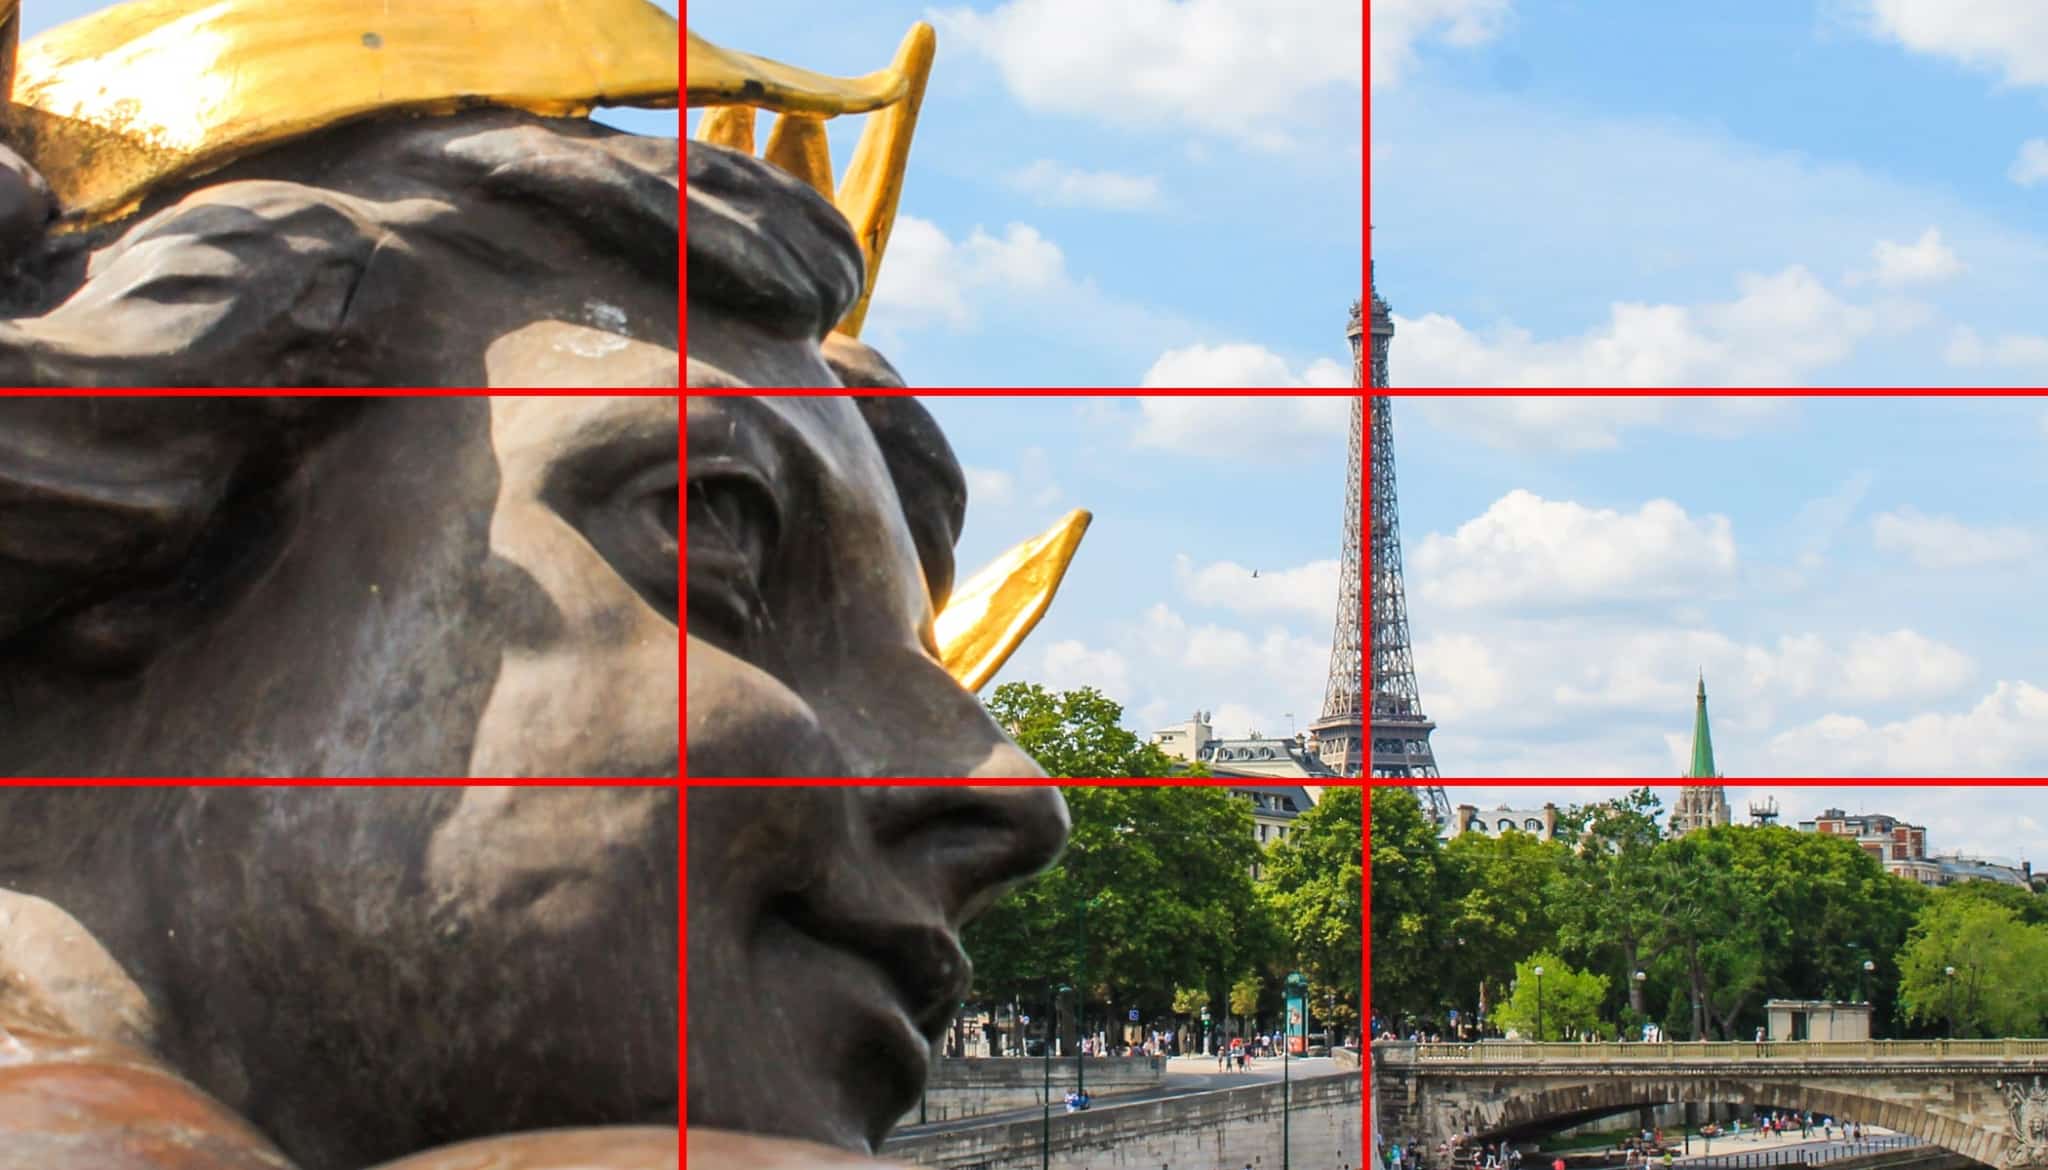
4. Nail the rule of thirds
It’s one of the basics of photography, and although I’m a firm believer that many photos lend themselves to a centre framing, this simple technique can easily transport a bland photo to one which is far more eye-catching. Most cameras now already have the grid visible, so just line up key parts of the frame with the crossed lines on the grid, and you will instantly see a difference.
Paris Book Lovers Tip: If you have a rainy day or simply want to photograph one of the most impressive collections of books there is in a grand and photo-perfect setting, then a visit to the Bibliotheque Nationale de France is a must.
5. Use people to tell the story
More and more with travel photography, those looking at the image want to feel a sense of place and like they are there. Paris is one of the easiest cities in the world to achieve this, thanks to the millions of tourists who descend on the city each year.
By placing a person in the frame you also add context to the shot, if someone is having a nap in a park it communicates it’s peaceful, if someone is browsing intently in a gallery it communicates their interest. Adding a human element to any photo in the right way will usually make the story and setting of the photo much stronger. So, instead of waiting forever for people to get out of your photo next time, try to include them within the story of the shot instead.
Best spot to try this in Paris: The markets and small stores along the Seine and near the Moulin Rouge are ideal for this.
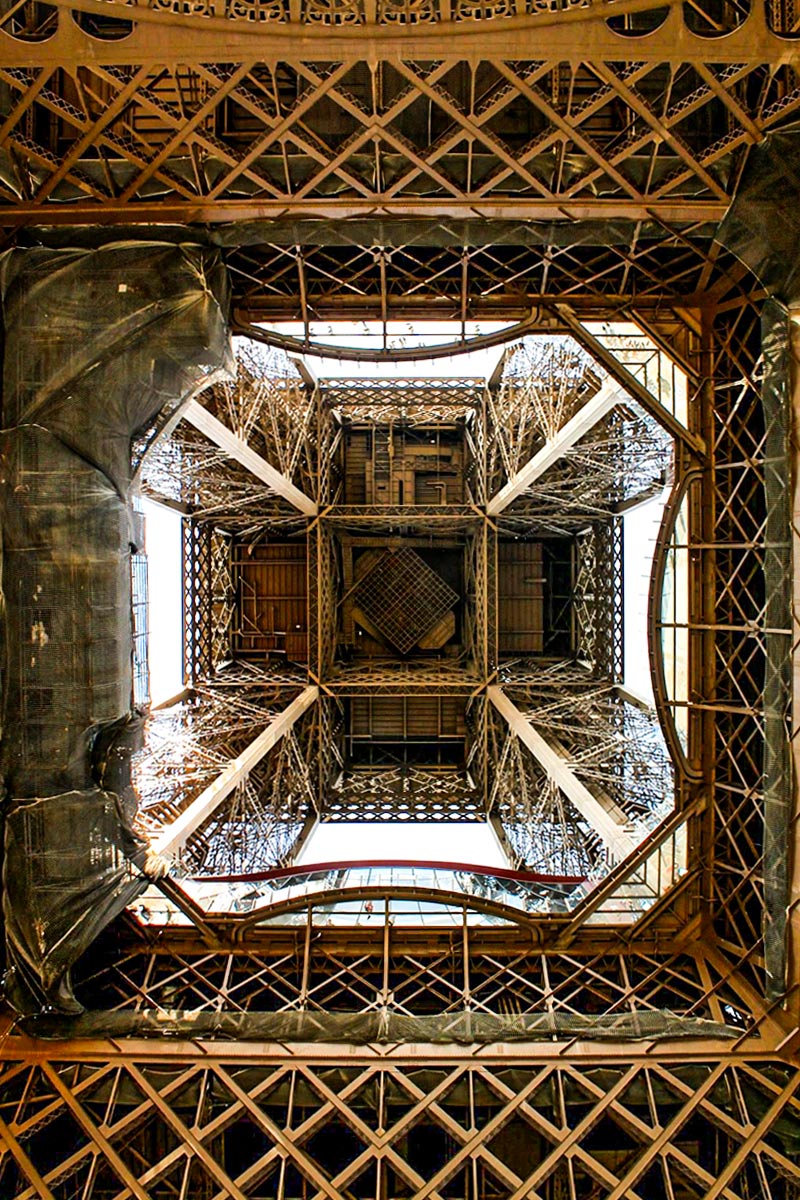
6. Experiment with different angles and levels
Look up in any city and you will likely discover hundreds of new photo opportunities you are missing, this is especially true in Paris.
Some architecture lends its self to looking directly at the sky, like the Eiffel Tower image below, sometimes it’s a good idea to get higher so you can have a straight on image. Double-decker buses might not be your thing, but the extra height can act as a great new way to see and photograph a city such as Paris. My rule is to go up anything I can, as the new perspective is not just great for photography but also gives you a better understanding of any destination.
Paris Sweet Treat Tip: If you are looking for traditional Paris food photography (think macaroons and pastries), then you can’t go wrong with a trip to Sébastien Gaudard. Not only are the colours and lighting perfect for photography, but it’s a mean spot to cure any sweet tooth.
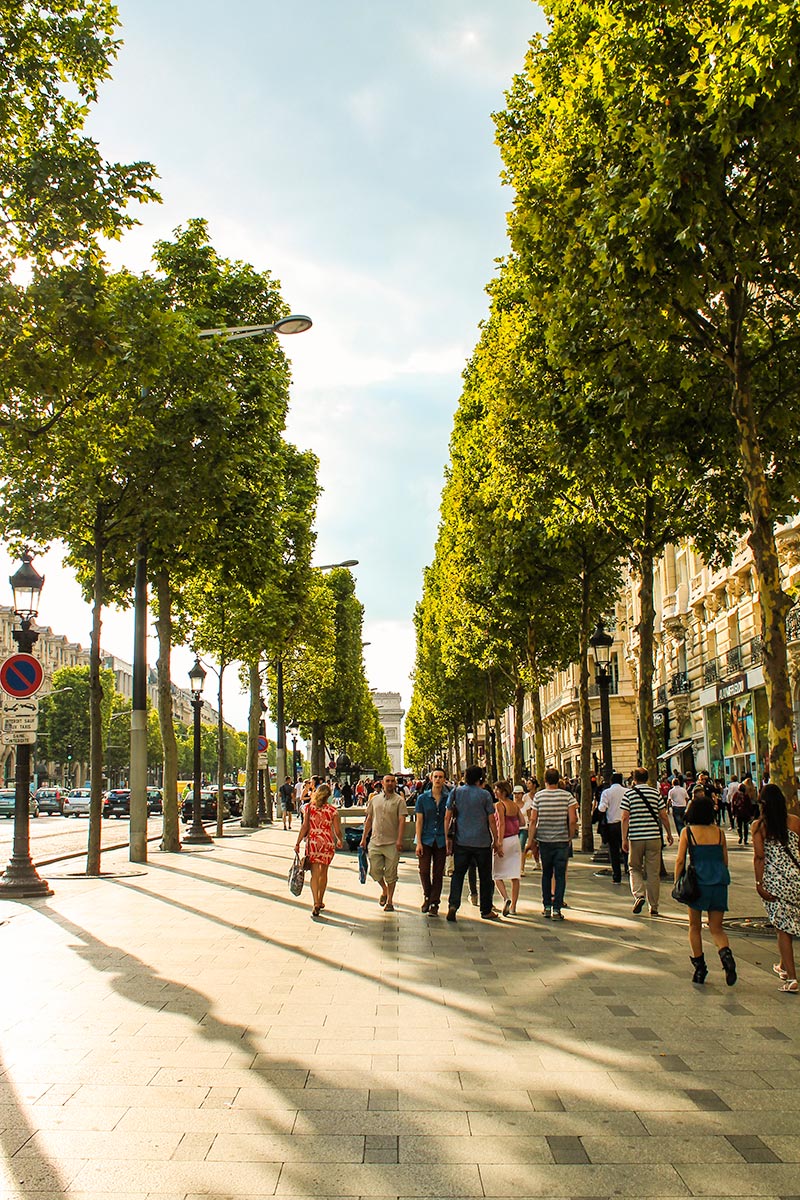
7. Learn how to use light to make a photo more interesting
One of the key components of photography is lighting, and natural light gives us so many beautiful hues to play with. An average road or setting can be completely transformed during the golden hour, which is why so many people love photographing during sunrise or sunset.
Make the most of the hours before and after, though, and you’ll find simple settings transformed by dramatic shadows and new details that you just won’t see with the mid-day sun. Try to mix in larger objects such as trees and buildings, which can create more dramatic shadows, with smaller, more detailed focus areas to make a simple photo seem like it has much more going on.
The best spot to try this in Paris is The Avenue des Champs-Élysées. As such a famous landmark in the city, you will want to photograph it, but the crowds and modern shops detract from the image. By making the most of the tree-lined streets in the setting sun, the shadows can really add impact to your photos.
These are some basic photo tips that, when applied, can be used to add much more depth to your photography. Sure, these images would likely be better if shot with my DSLR in raw, but you don’t need to spend thousands on camera equipment to frame a better shot.


Awesome learning, thanks for the tips. btw do you have instagram page for all this?
Love your article Dan. I’m headed to Paris with my DSLR in July and this was really helpful. Cheers.
Thanks Dani. Have an amazing time in Paris!!